Publish an ITT using attachments
How to Publish an ITT using attachments
Open the Invitation to Tender (RFx) event by clicking the Start link in the top right hand corner.

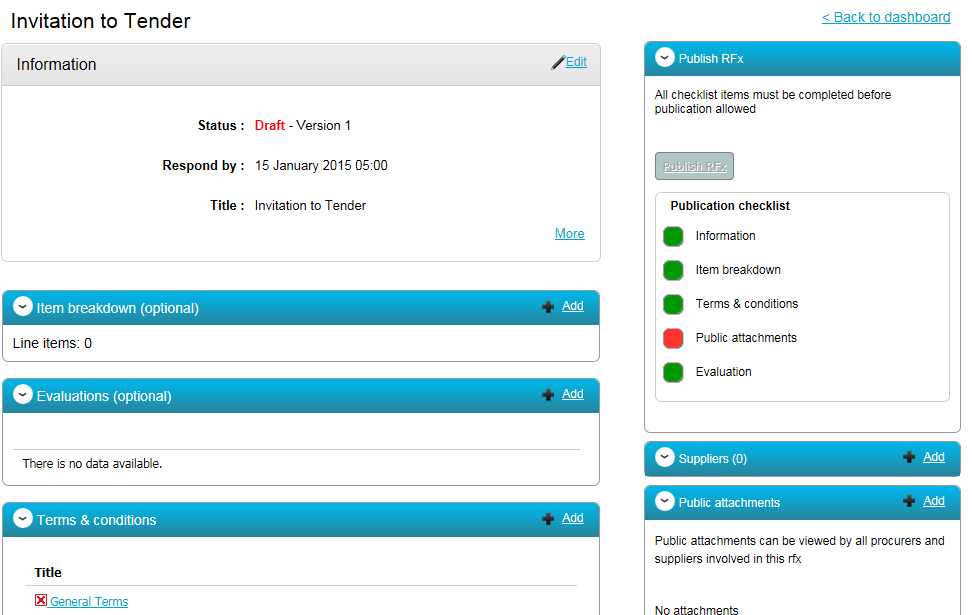
The Invitation to Tender stage is now displayed; this is the pack you wish to go out to your potential suppliers.
Initially you need to populate the following information:
Title |
The title of the procurement exercise |
Description |
Detail for suppliers i.e. what is the opportunity? What documents are you sending them? What do they need to do next? Etc. |
Link to advert |
Here you should select the ‘Place Advert’ option to link the tender pack to the advertisement placed earlier on in these exercises |
Respond by |
The time and date responses need to be received by |
Point of delivery |
This is an optional field in the instance that the site for the delivery of the goods or service is a remote site rather than the main head office |
Once all relevant information has been set click Continue to access the other parts of the RFx step
Sections available within the RFx step for population are as follows:
Item Breakdown (optional) |
This section allows for population with various line items, essentially listing goods which are required and the specified quantity of each item. Suppliers can then enter a unit price for each item listed as part of their response. |
Evaluations (optional) |
This section would be used to add an online evaluation which has been prepared in the system. |
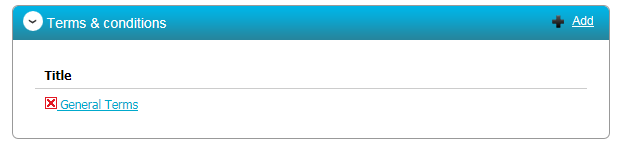
Terms & conditions |
Terms and conditions applicable to this tender opportunity are added in this section. Default terms and conditions are entered which have been set |
Suppliers |
Facility to add your own suppliers in to this area if the procurement exercise is not to be advertised i.e. quotation process, call off etc |
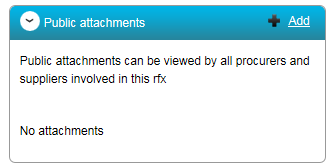
Public attachments |
Any documentation which the supplier needs to download, review and/or complete should be added into this area |
There are also links to Audit history and Visit history on this screen, these are data capture sections listing various actions or visits in relation to the RFx step.
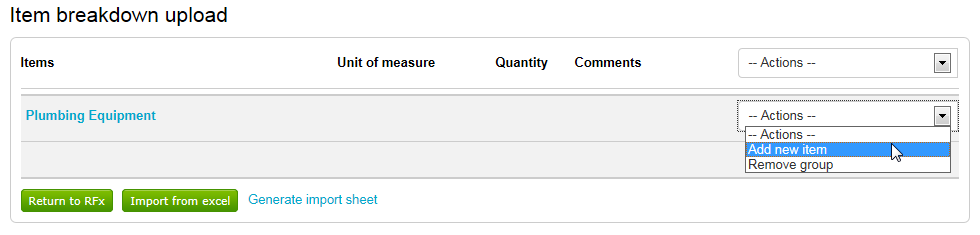
Item breakdown is populated within the RFx step if there are various items required which suppliers need to submit a unit price for.
To open this section click the Add link in the top right hand corner

To add a new group or item select the relevant option from the Actions list provided as shown.

If adding a new Group simply give the group a title / description and click Create group.
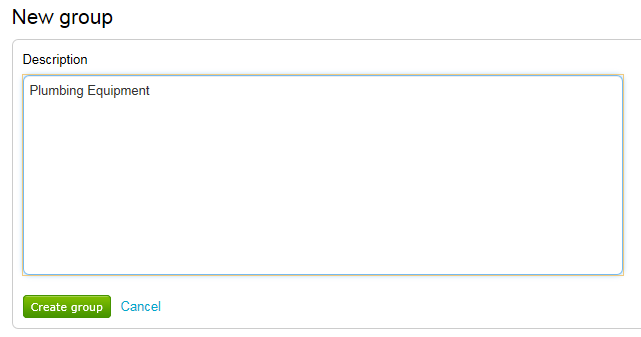
Now the group is available to add the various items required within it.
To add a new item to the group select Add new item from the Actions list available within the newly created group as shown below.
Details of the new item can then be added as shown. Fields available for population when adding a new item are as follows:
Description |
Product information |
Unit of measure |
Is this per item, per pack etc |
Quantity |
Number of items / packs required |
Comments (optional) |
Any further information which potential supplier may need in relation to the item listed |
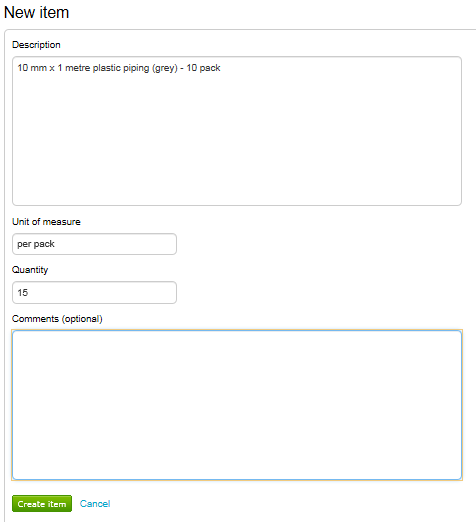
Once all item details have been populated click Create item to finalise, the item will now display within the group/list as shown.
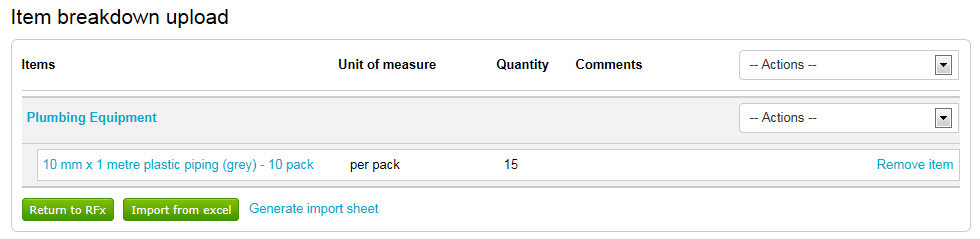
Click Return to RFx
Now terms and conditions for the tender exercise can be added into the tender pack. Note: Any terms and conditions added into the library by a system Administrator and set as default will automatically appear within the Terms and Conditions section as shown.
To add or amend the terms and conditions area, click the Add option in the top right hand corner of the event.
You are now taken to the Terms & conditions library where additional sets of terms and conditions can be added / removed as required. If there are numerous sets of terms and conditions available the number displayed to the user can be refined by applying the relevant department filter applicable on the left hand side of the screen.
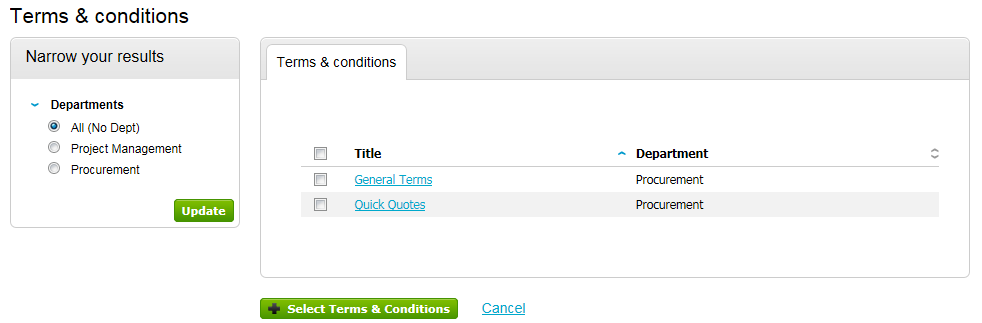
To add a new set of terms of conditions within the RFx step simply check the box on the left hand side of the terms and conditions and click Select Terms & Conditions.
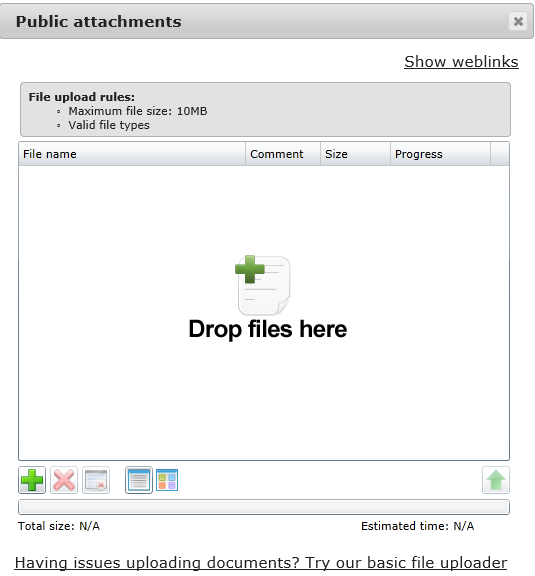
Attachments which need to be issued to potential suppliers as part of the tender pack are now added under the Public attachments area.
To add a Public attachment click the Add option in the top right hand corner of the section. The following screen will now be displayed.
Files for uploading can now be added by dragging and dropping the relevant file into the area above or by clicking on the  icon to select the required files.
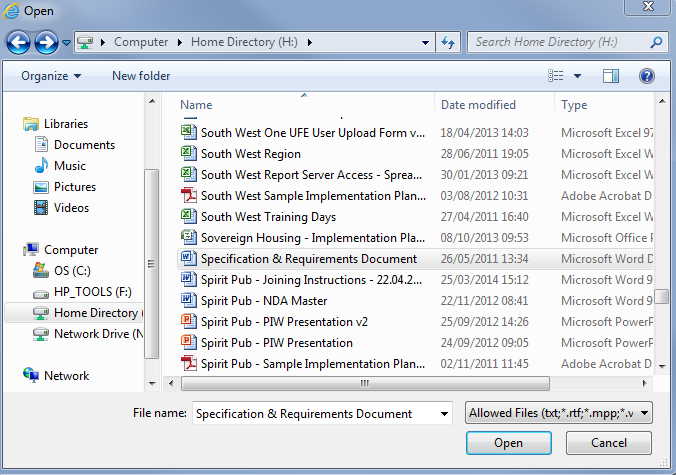
Select the required file via the browser option as you normally would, then double click or click Open.
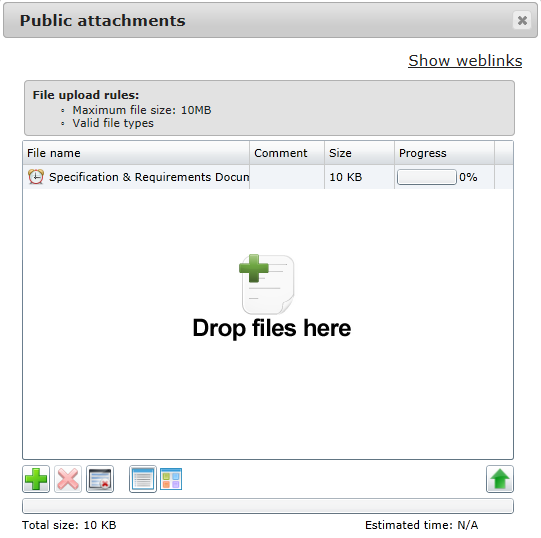
Your chosen file(s) will now be displayed as shown to begin uploading click on the ![]() icon.
icon.
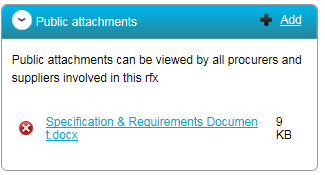
Your chosen files are now displayed in the Public attachments section. If you have attached a file incorrectly this can be removed by clicking on the  icon.
icon.

The Suppliers area allows a user to select suppliers which will be issued the procurement documentation (RFx event).
To add your chosen suppliers click Add in the top right hand corner of the event to display available suppliers.
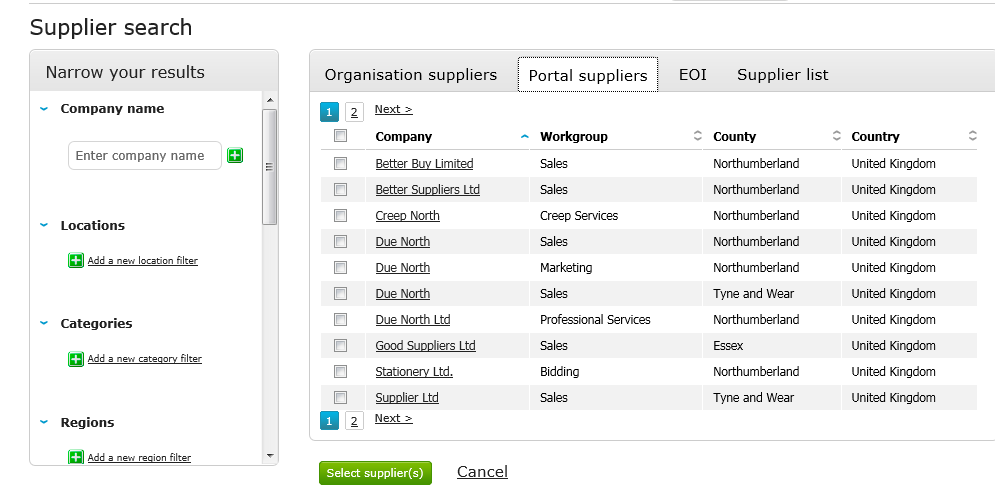
The tabs available to select suppliers from are as follows:
Organisation Supplier |
Suppliers specifically ringfenced for the organisation |
Portal Suppliers |
All suppliers registered on the portal |
EOI |
Suppliers that have expressed an interest in an advertised tender opportunity |
Supplier List |
Customised supplier lists created by the system Administrator for the organisation |
Select your chosen suppliers by checking the box(es) next to the supplier(s) you want the documentation to be issued to and then click Select suppliers
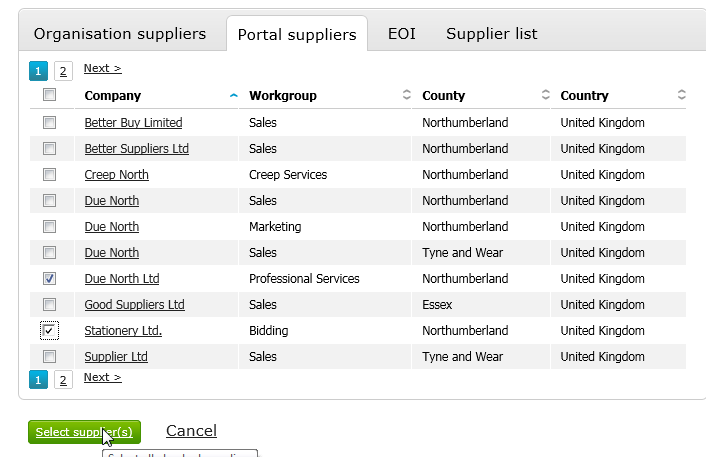
Your chosen suppliers will now have been added into the Suppliers section.
To view the suppliers selected simply click on View

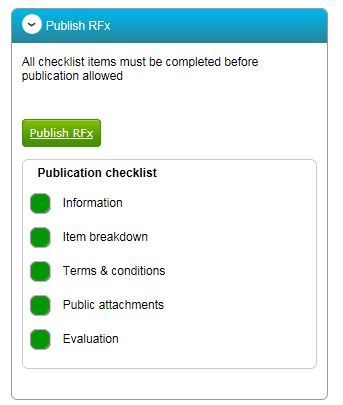
The RFx step can now be published by clicking the Publish RFx button.
Once published the following summary screen will be presented, this summary view advises how long remains until the submission deadline as well the supplier response status for the tender.
Note you will only be allowed to Publish when all key areas shown in the Publication checklist are coloured GREEN
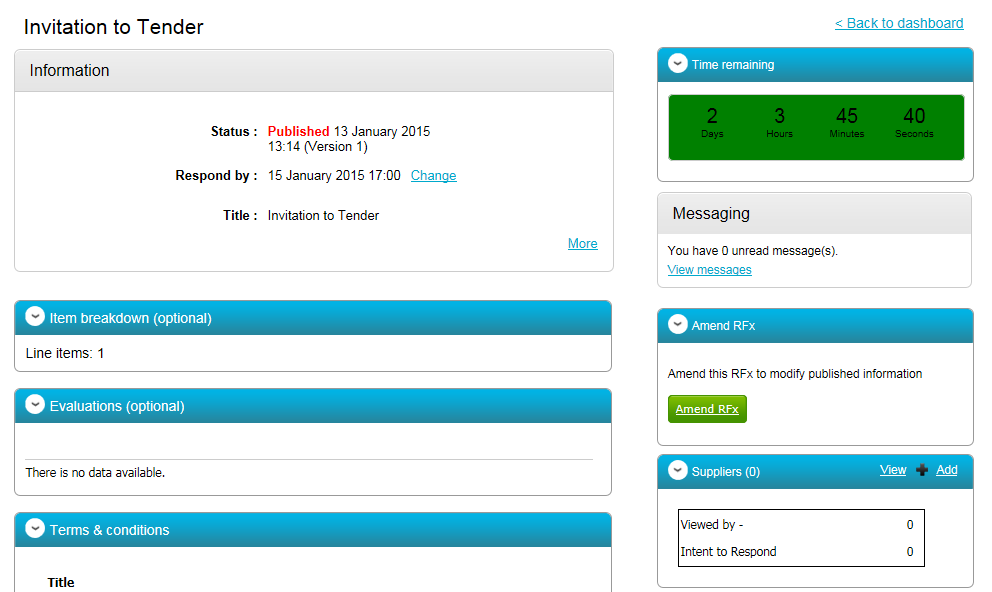
Click Back to dashboard to return to the main project dashboard.