Complete OJEU forms
How to Complete OJEU Forms
The way OJEU notices are processed through our ProContract software changed on 1st January 2015. The changes were made to incorporate the new form schema 2.08 and ensure compliance with upcoming legislation changes. All notices will continue to be placed via the relevant event type within the project/tender exercise in question.
Login to ProContract in the usual way and access the relevant project/tender where an OJEU notice needs to be submitted.
Once on the Contract Dashboard for the project/tender in question Start the event as normal.
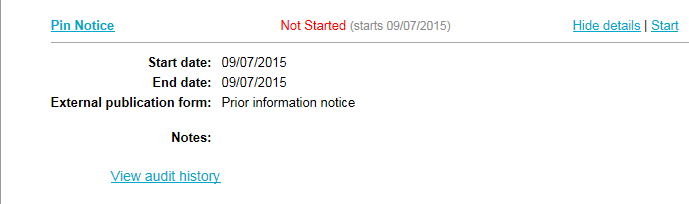
You will now be taken into the new look OJEU form as shown below:
Note: Please be patient while the system loads the form as this may take a little longer than usual.
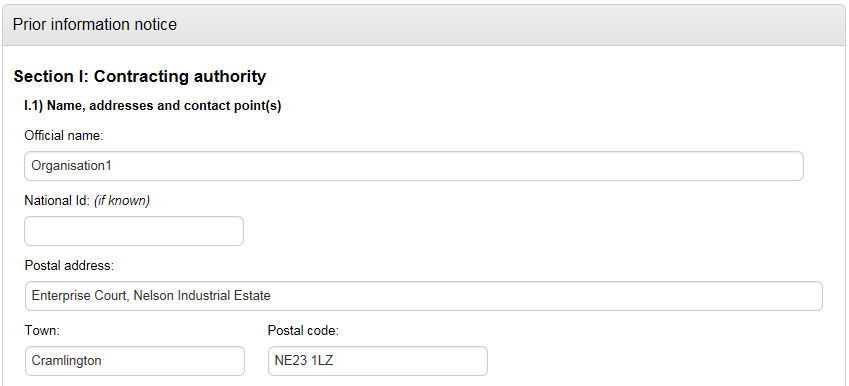
You will see that there are no quick links to navigate round the form as there are currently; with this form you simply continue to scroll down the page and populate the required fields as normal.
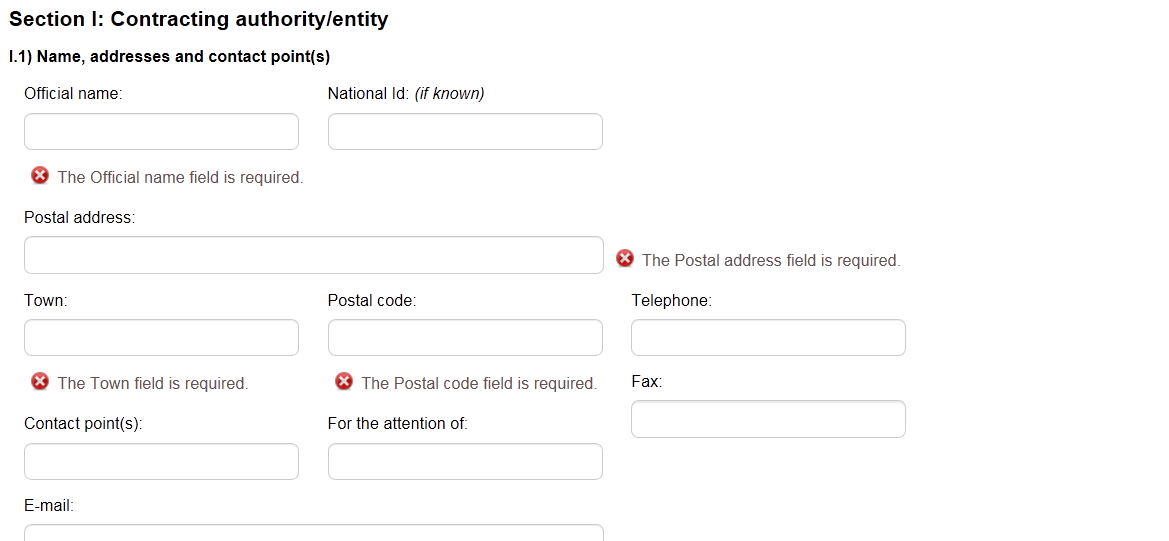
Any mandatory fields will be clearly highlighted.
Note: At present, address details etc are no longer pulled through into the OJEU notice automatically and will need to be entered manually by the end user.
CPV Codes / Nuts Codes Selection
When populating the OJEU notice CPV code/NUTS code selection has now also changed. Click Add CPV Codes and Select NUTS codes
CPV Codes Entry
You can add up to 99 CPV codes. Click Add CPV codes

You are then able to search or select directly from the list of codes presented.
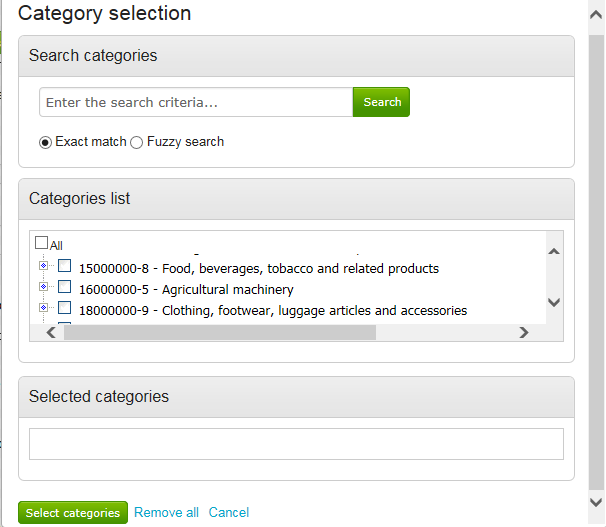
You will then need to select the main category that best describes the overall project. To do this, click the radio button to the left of the CPV code (note: only one main category may be selected).
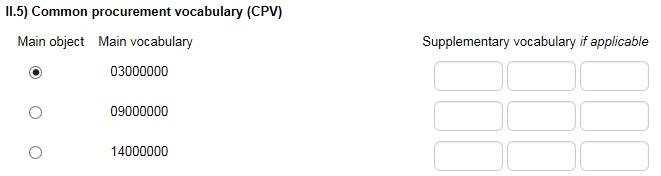
Where possible we would recommend using the highest level of CPV code to provide the best possible reach for potential suppliers. This will include all sub categories.
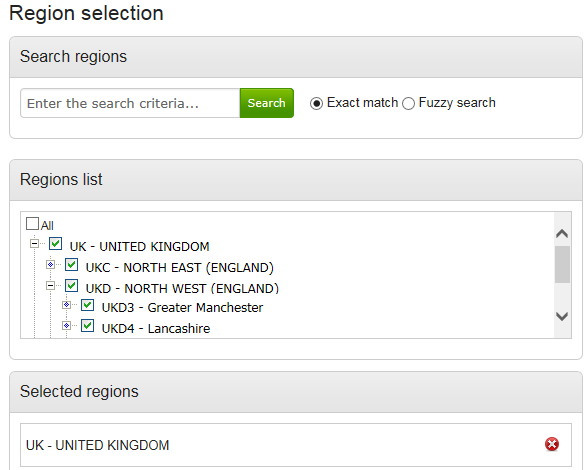
NUTS Codes Entry
Click Select NUTS codes

You will then be able to select the regions you require.
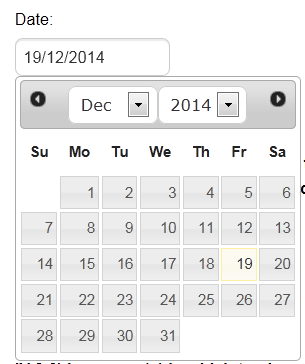
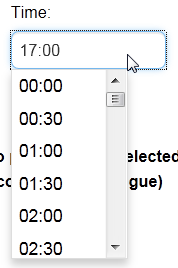
Date and Time Entry
When populating a date or time within an OJEU notices you will be provided with the following functionality:
Date Entry: Click in the box and select the date via the pop up calendar function.
Time Entry: Click in the box and select the required time from the options provided.
OJEU Notice Submission
Once all details within the OJEU notice have been populated simply click ‘Submit form’ to publish via Tenders Electronic Daily (TED). Your reference number will be returned in the usual way.

Submission Status and Viewing PDF
Once you submit your notice you will be able to view, save and print a PDF version of the TED eSenders form.
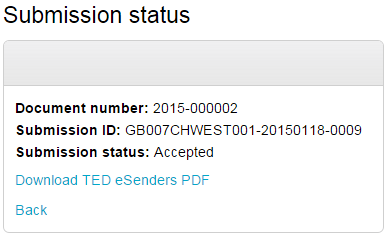
You will also be able to see the status of your notice. Once published, you will see the document number and submission ID.
Other Key Changes to OJEU Notice Completion
- Publish Approval options can no longer be applied to OJEU Notice steps within ProContract. Step Closure approval options can however be applied in the usual way.
- EU Statistics Report within the standard reporting suite will not return details of any projects/tenders processed via the new process from the 1st January 2015.
- Currently Step Detail for the OJEU notice in question and Audit History for the project/tender within the main ‘Contract Dashboard’ will not detail which user processed the notice and/or the time and date of submission. A bespoke step type may be added to the project/tender in question and populated with the relevant information if required.